Easter Cheesecakes!

HEY Y’ALL!

Happy (late) Easter! Hope you all had a great weekend and the Easter bunny brought you lots of yummy treats 😉 #chocolateoverload!

Saturday my momma and I spent most of the day in the kitchen making lots of goodies and food for Easter Sunday! She found a recipe a few weeks ago for little cheesecake bites she wanted me to make that looked like a little nest with speckled chocolate eggs in it so OBVIOUSLY I obliged! hahaha I LOVE CHEESECAKE! So Saturday morning and into the afternoon I made these cute homemade cheesecakes and they were a hit! So I’m going to show you how I made them, and since Easter is over give you some other tips on what you can top them with to make them all throughout the year! (Or just come back and visit next Easter and make them then! 😉 )
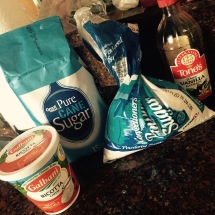
You’ll Need:

1 Cup of Graham Crackers

3/4 cup + 2 Tbsp Sugar

1 Tsp Vanilla Extract

3 Tbsp Butter

3 Eggs

3 packages of 8oz Cream Cheese

(and coconut and M&Ms for the Easter version)


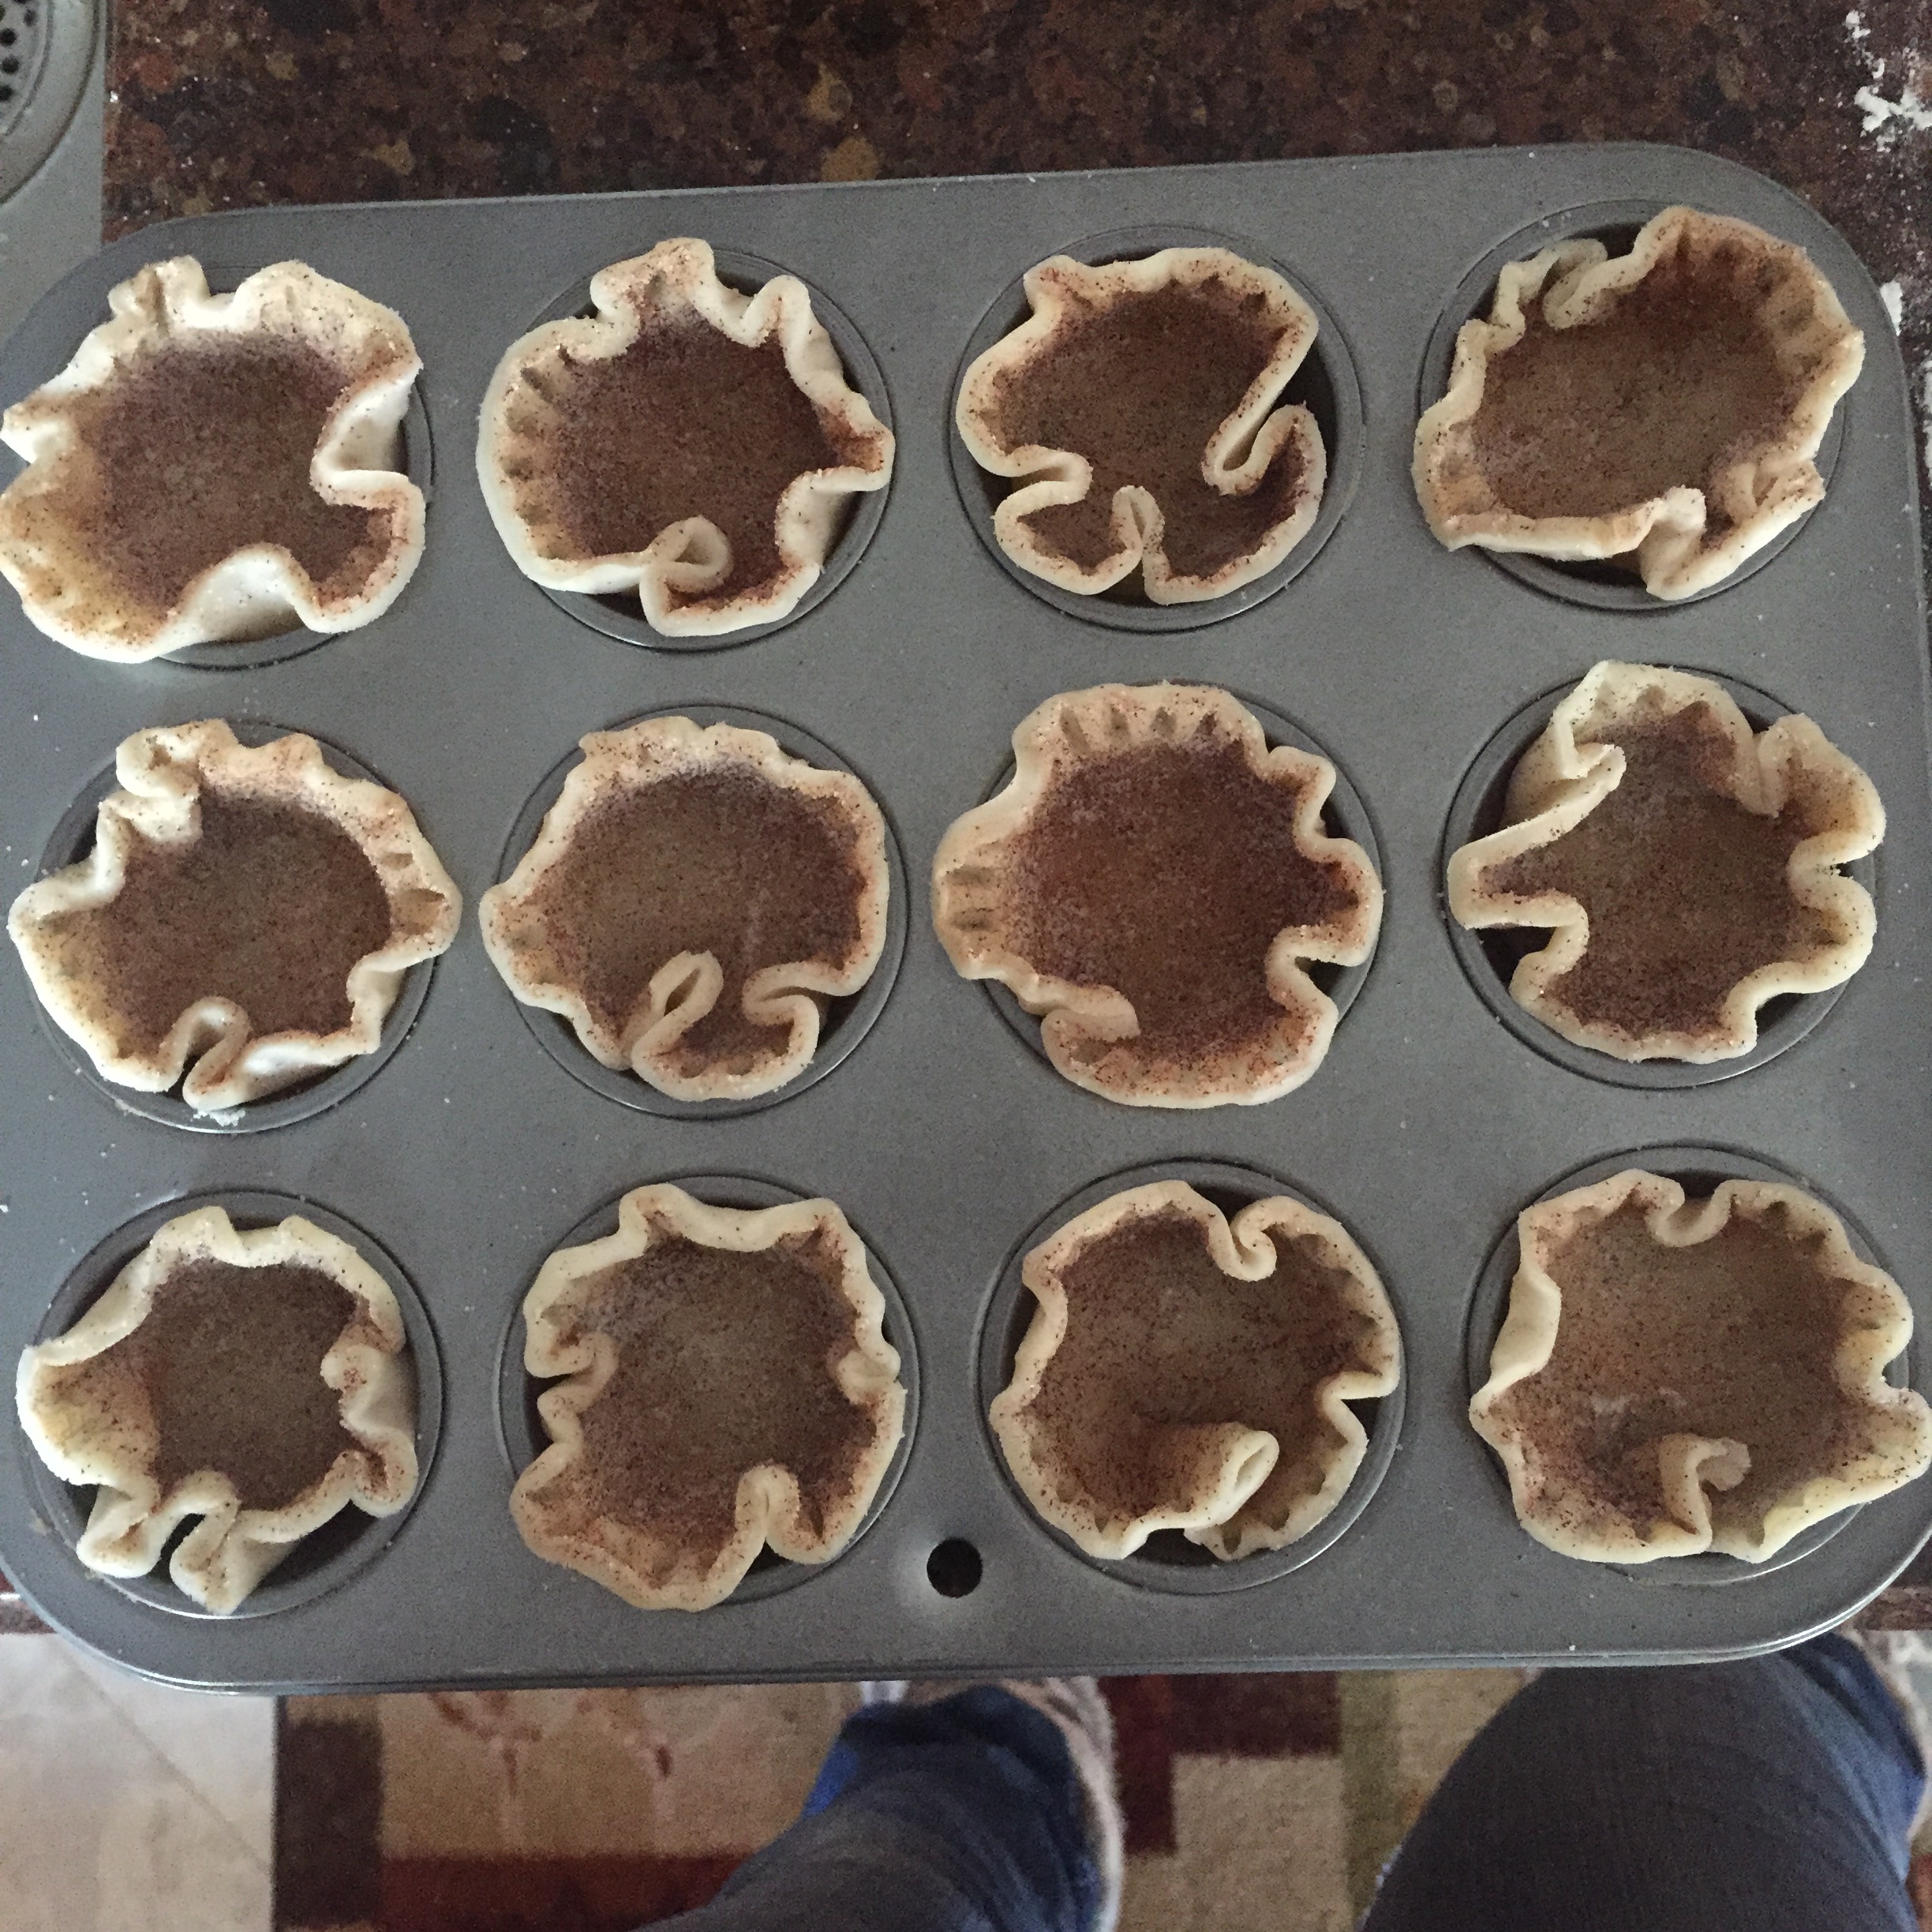
Before you get started, preheat your oven to 325 and line 18 cupcake tins
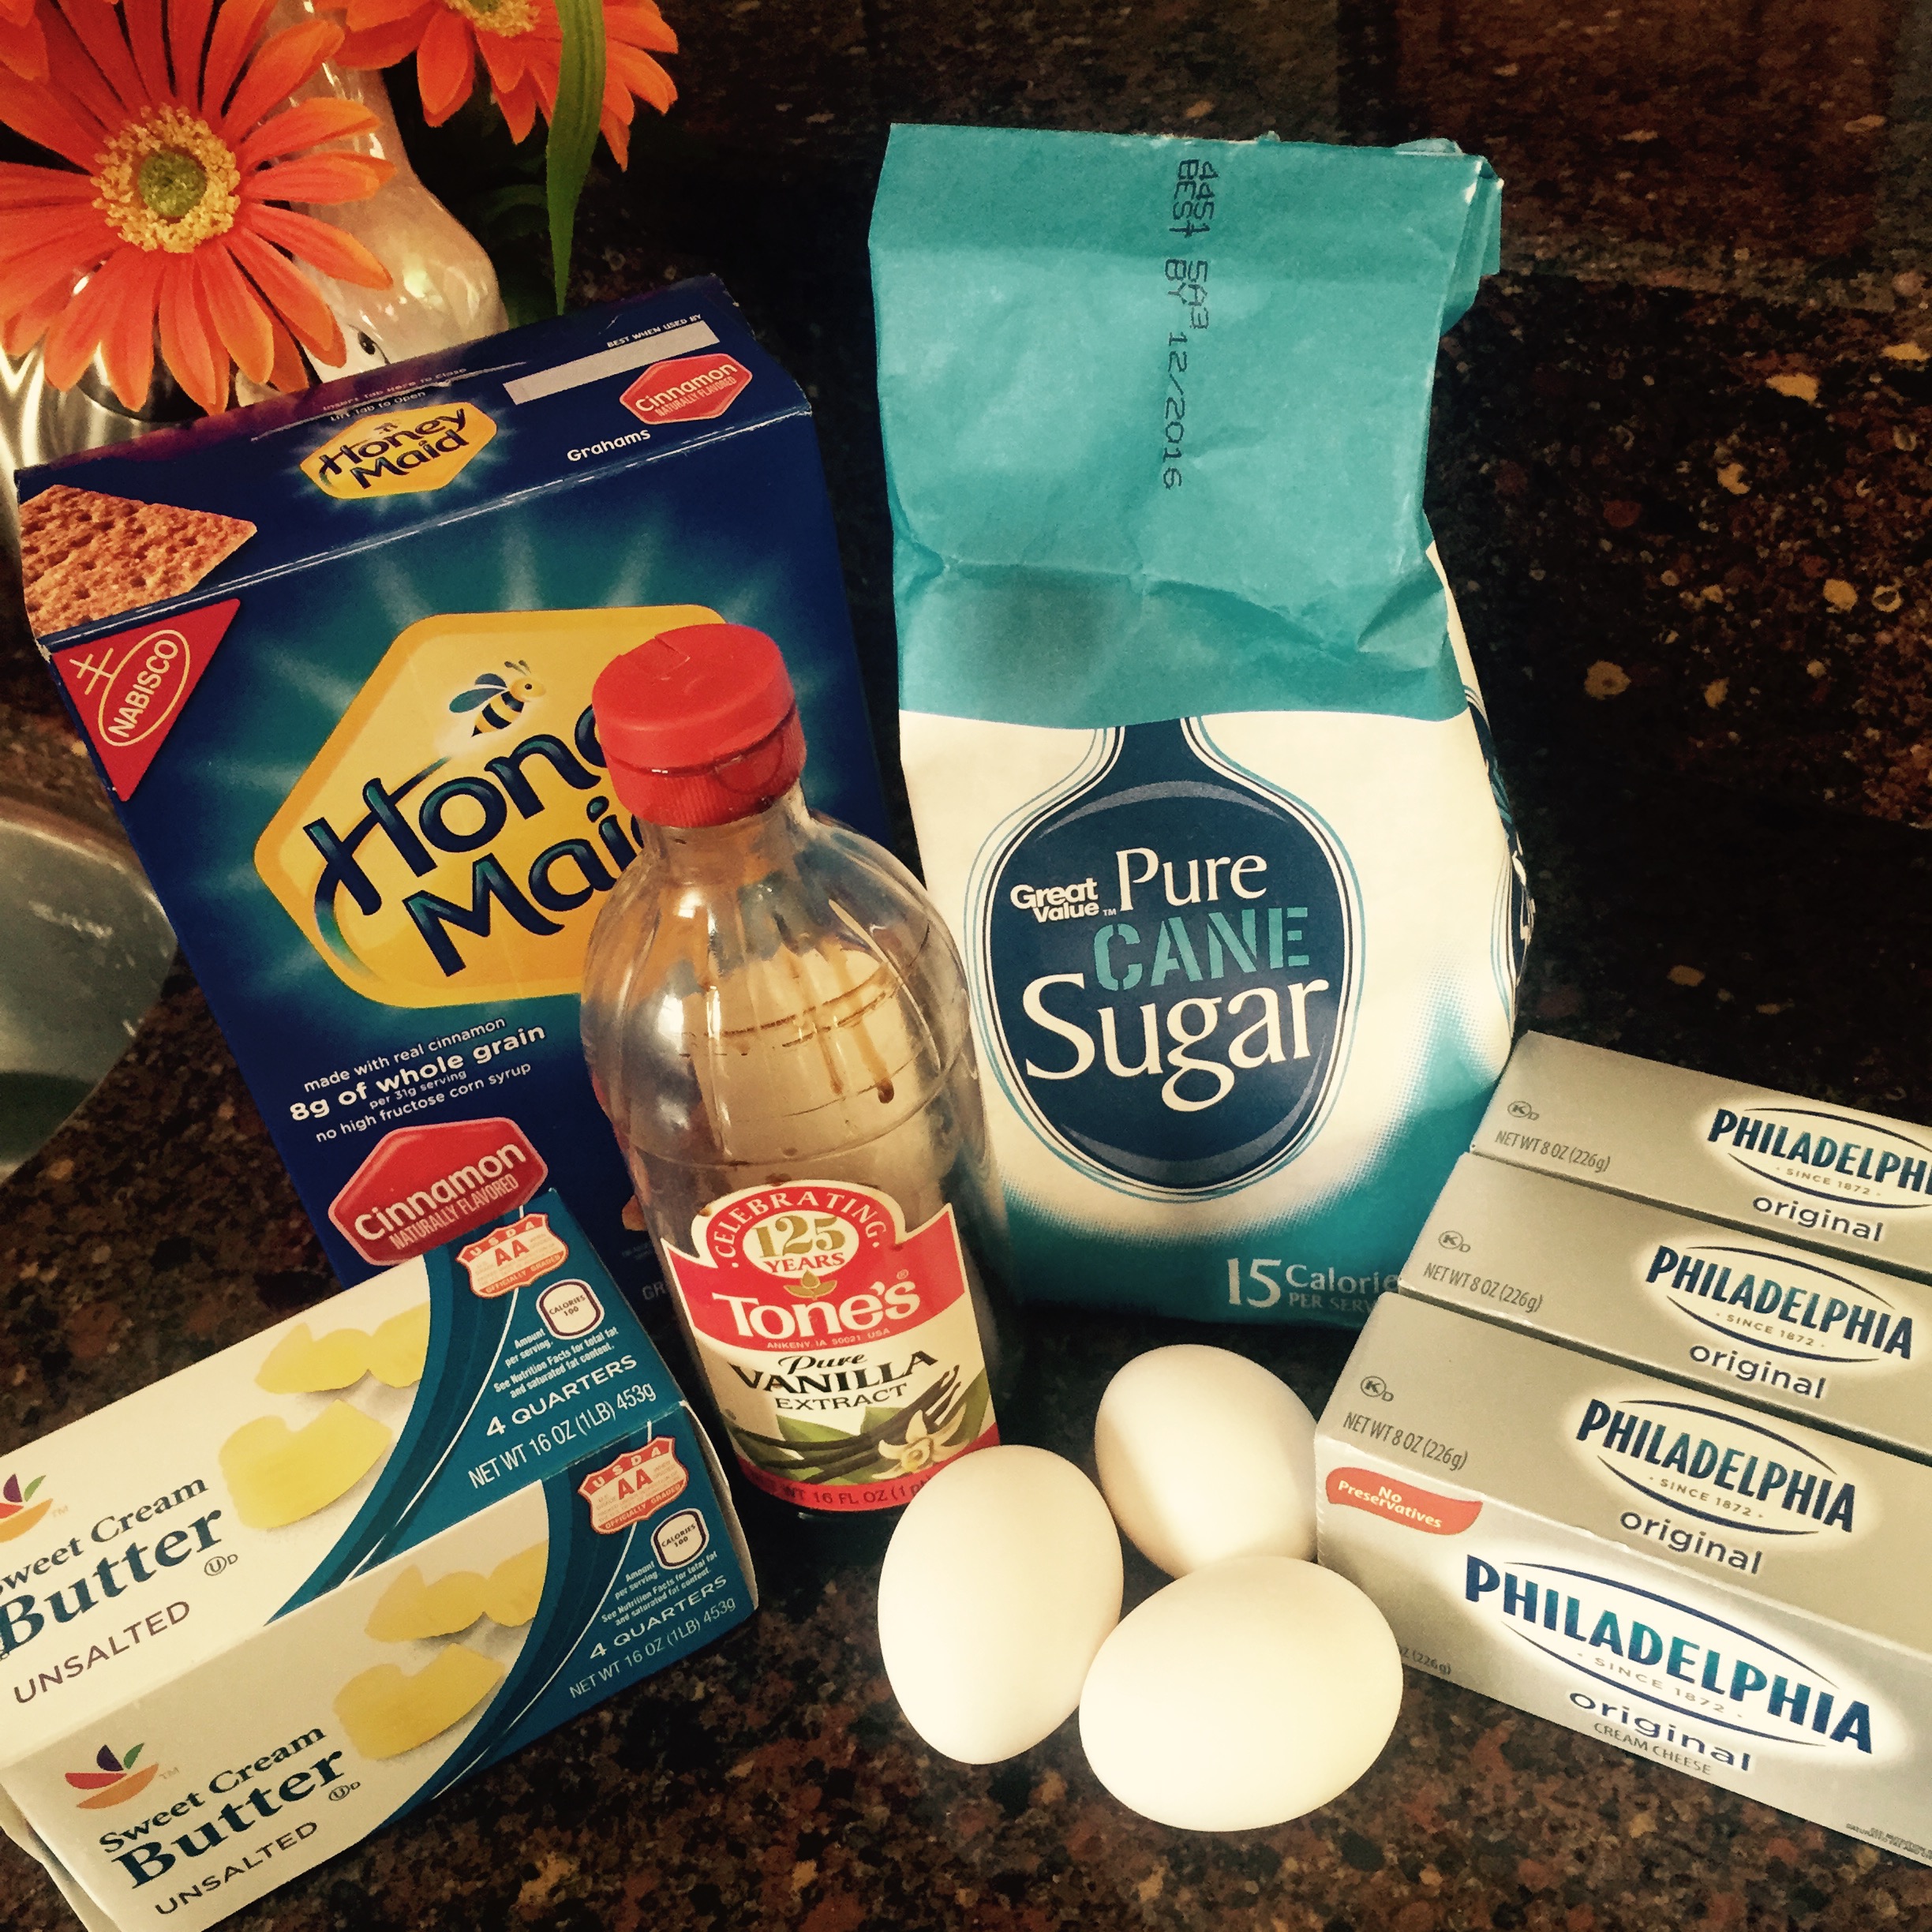
FullSizeRender (23)

For the Crusts

Step 1: In a food processor or a large Ziploc bag, crush one cup of graham crackers

Step 2: In a medium sized bowl, mix your 1 cup of graham crackers, 3 Tbsp of butter, and 2 Tbsp of sugar

Step 3: Press the mixture into the bottom of your 18 cupcake tins

*I FORGOT TO TAKE A PIC OF THIS STEP! BUT I used a heaping spoonful to spoon in the crust mix and pressed it down with my fingers*


For the Filling

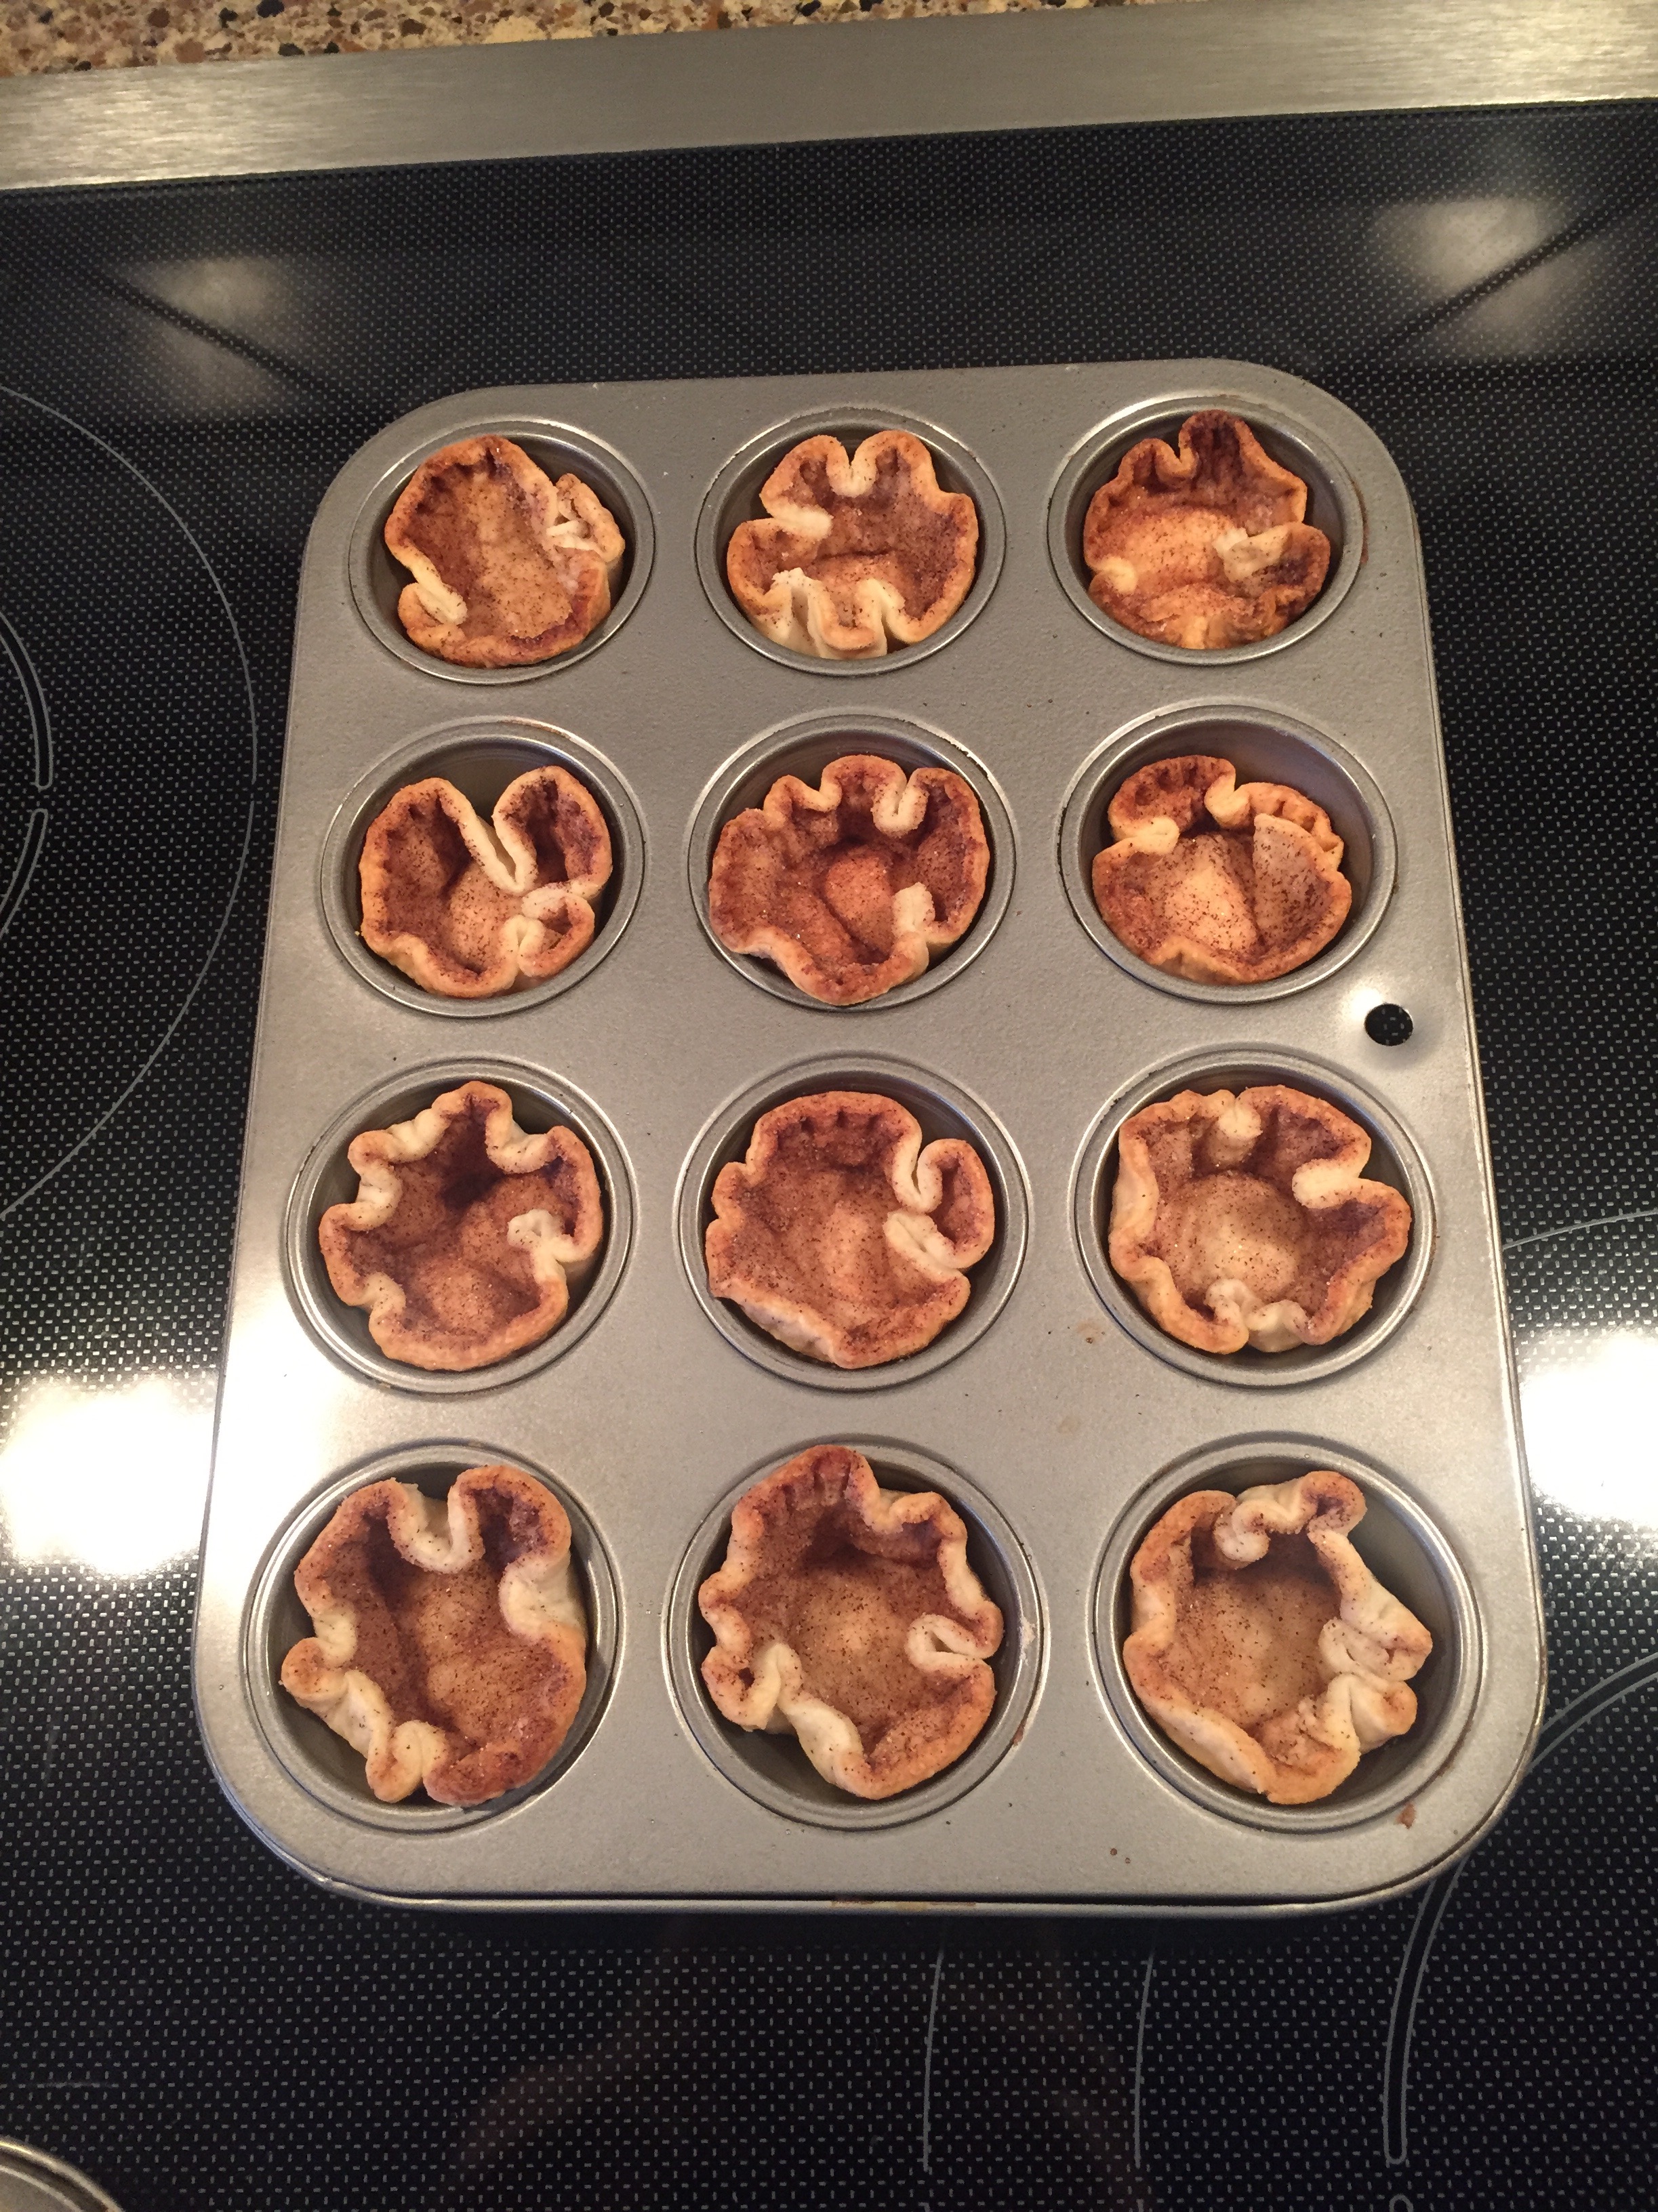
Step 1: In a large mixing bowl, mix 3 packages of cream cheese, 3/4 cup sugar, and 1 Tsp vanilla extract until smooth

Step 2: Add each of your 3 eggs one at a time into the mixture using the lowest setting on your mixer

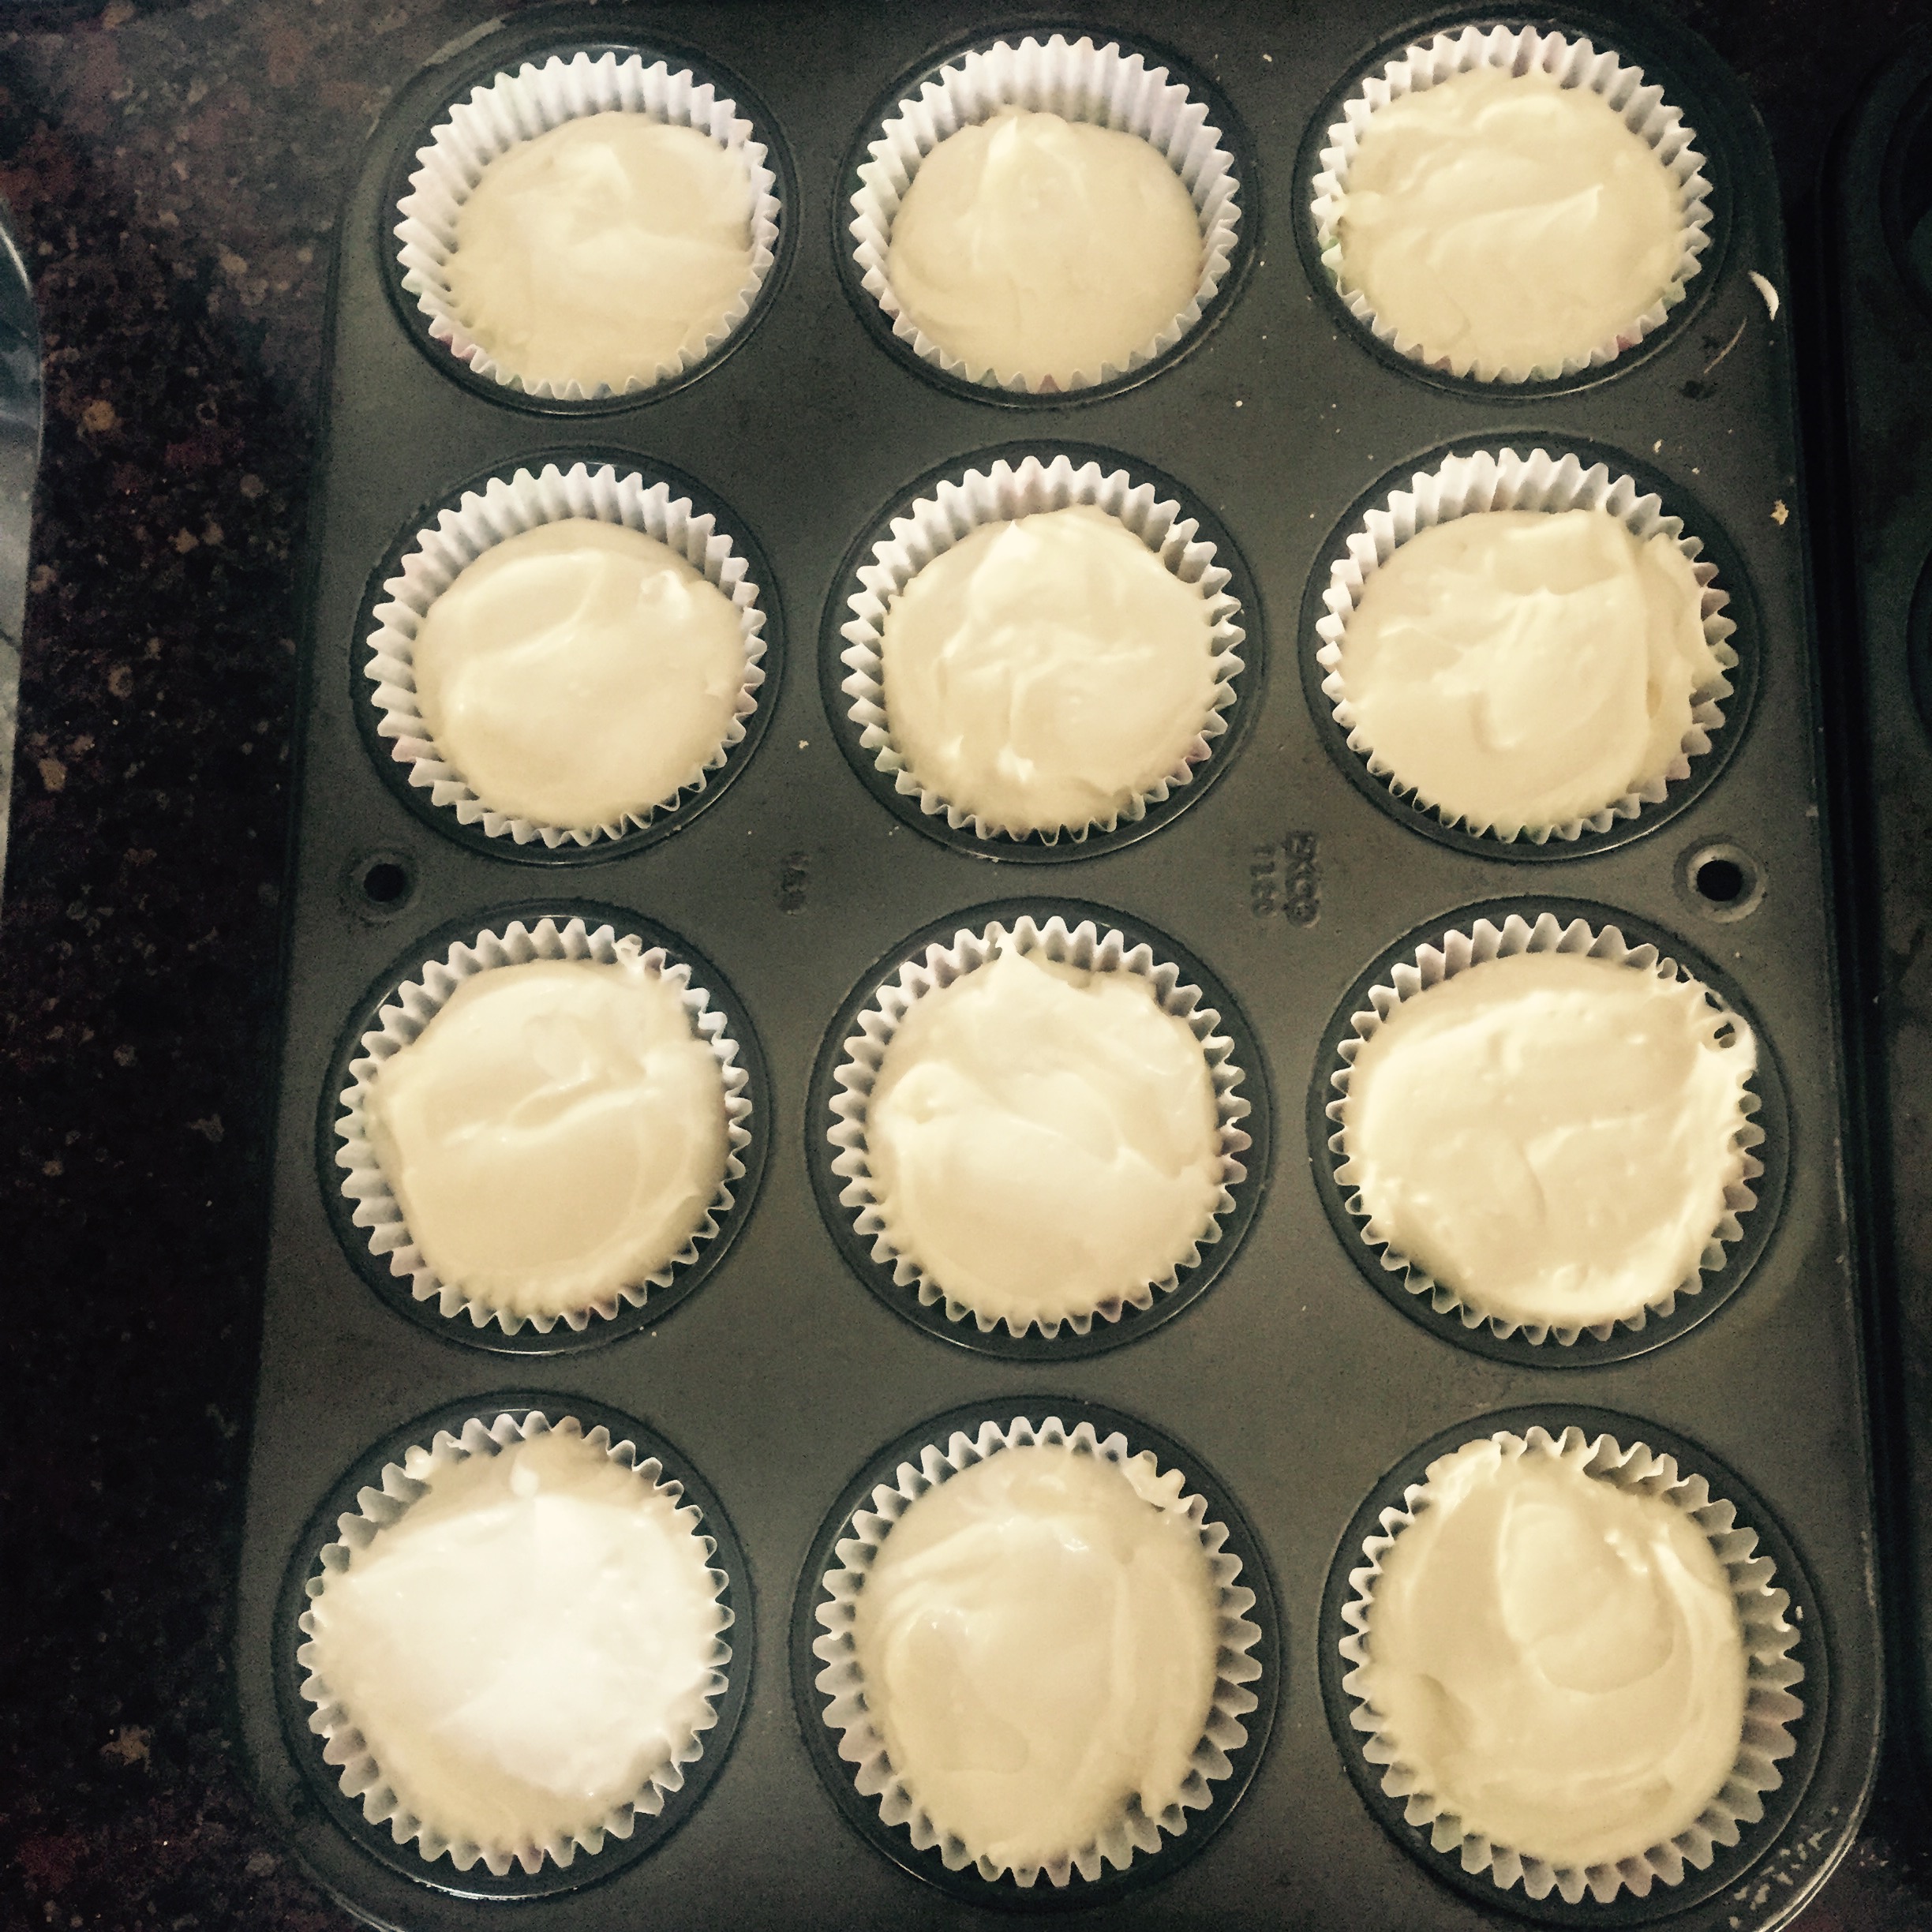
Step 3: Once smooth, place a large spoonful in each cupcake tin

Step 4: Bake for 25-30 minutes! You’ll be able to tell if they’re done by jiggling the pan; if they jiggle pop them back in for a bit!

(Here’s how full mine were! Very close to the top, unlike a cupcake or muffin!)

FullSizeRender (24)


Once they come out of the oven, let them cool down completely! Right when you pull them out they’ll be a little puffy and mine even had some cracks in them but when they’re completely cool they’ll go down a bit and the cracks will have sort of molded back together! Mine kind of sunk in at the middle if you can see in the pic below! After they’re all cool refrigerate them for at least 2 hours! I left mine in overnight and took them out a few hours before serving but if you’re serving that day make sure you give them at least 2 hours!

FullSizeRender (25)


FullSizeRender (26)

For the Topping

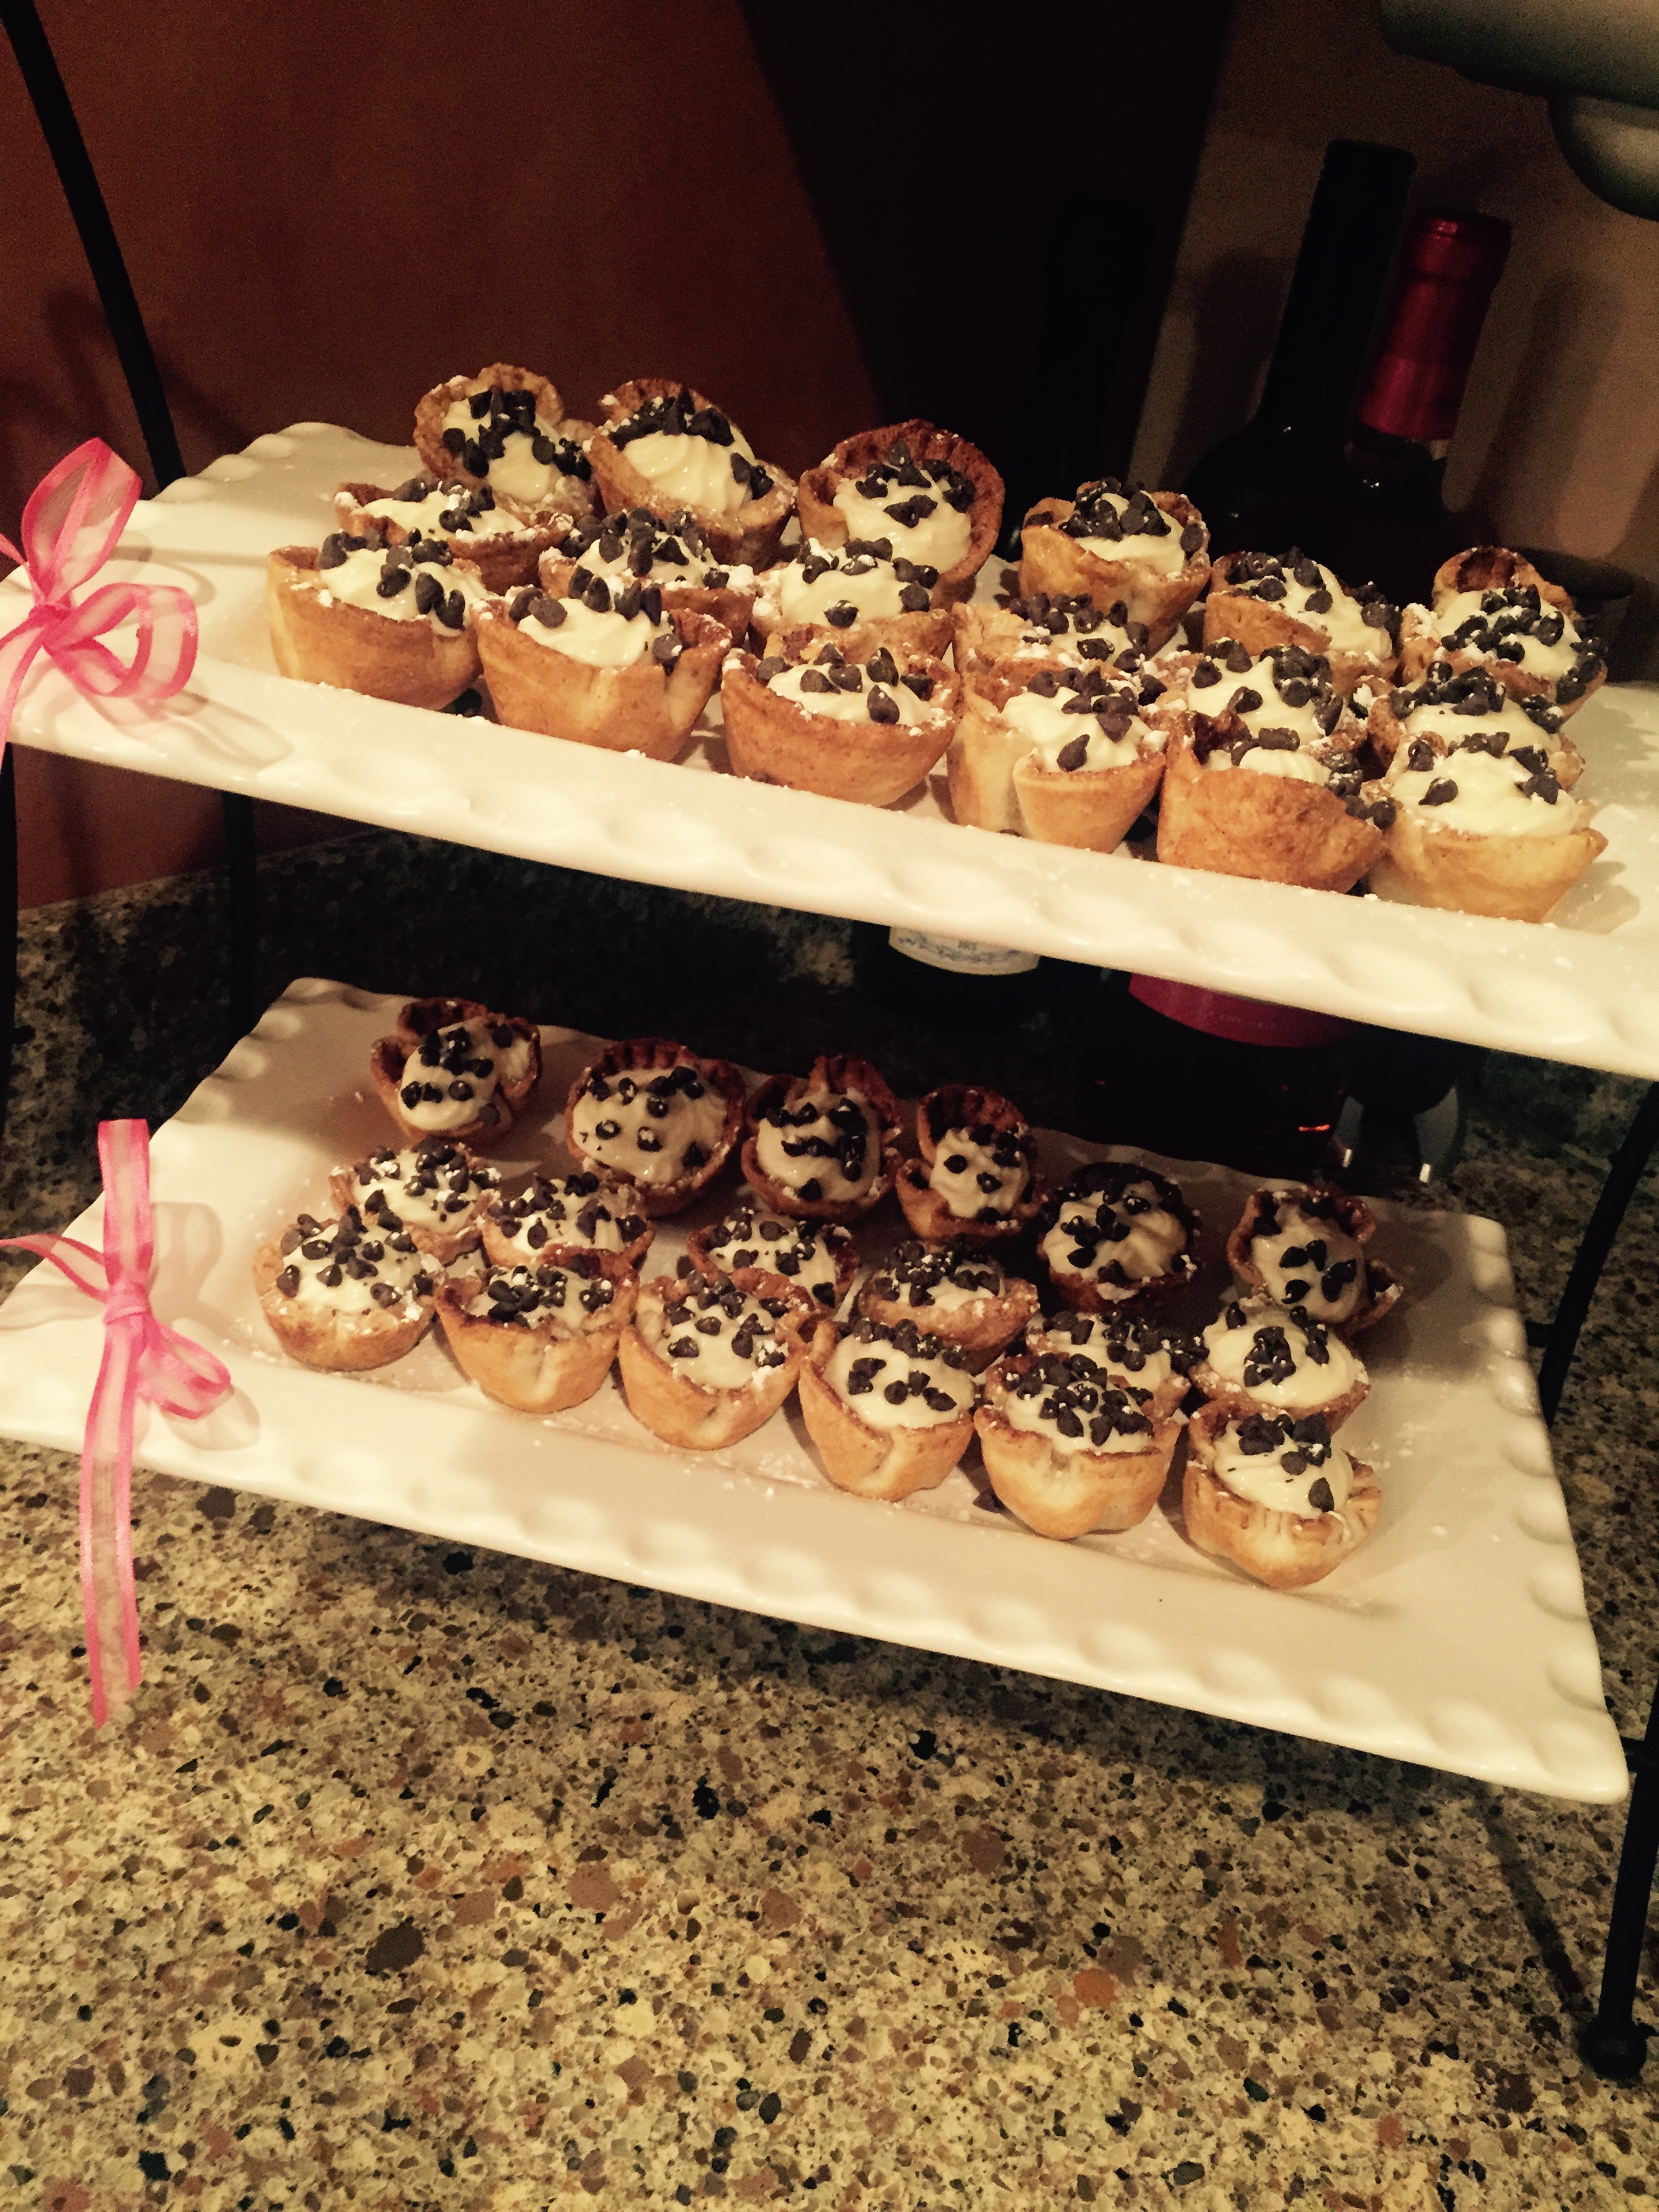
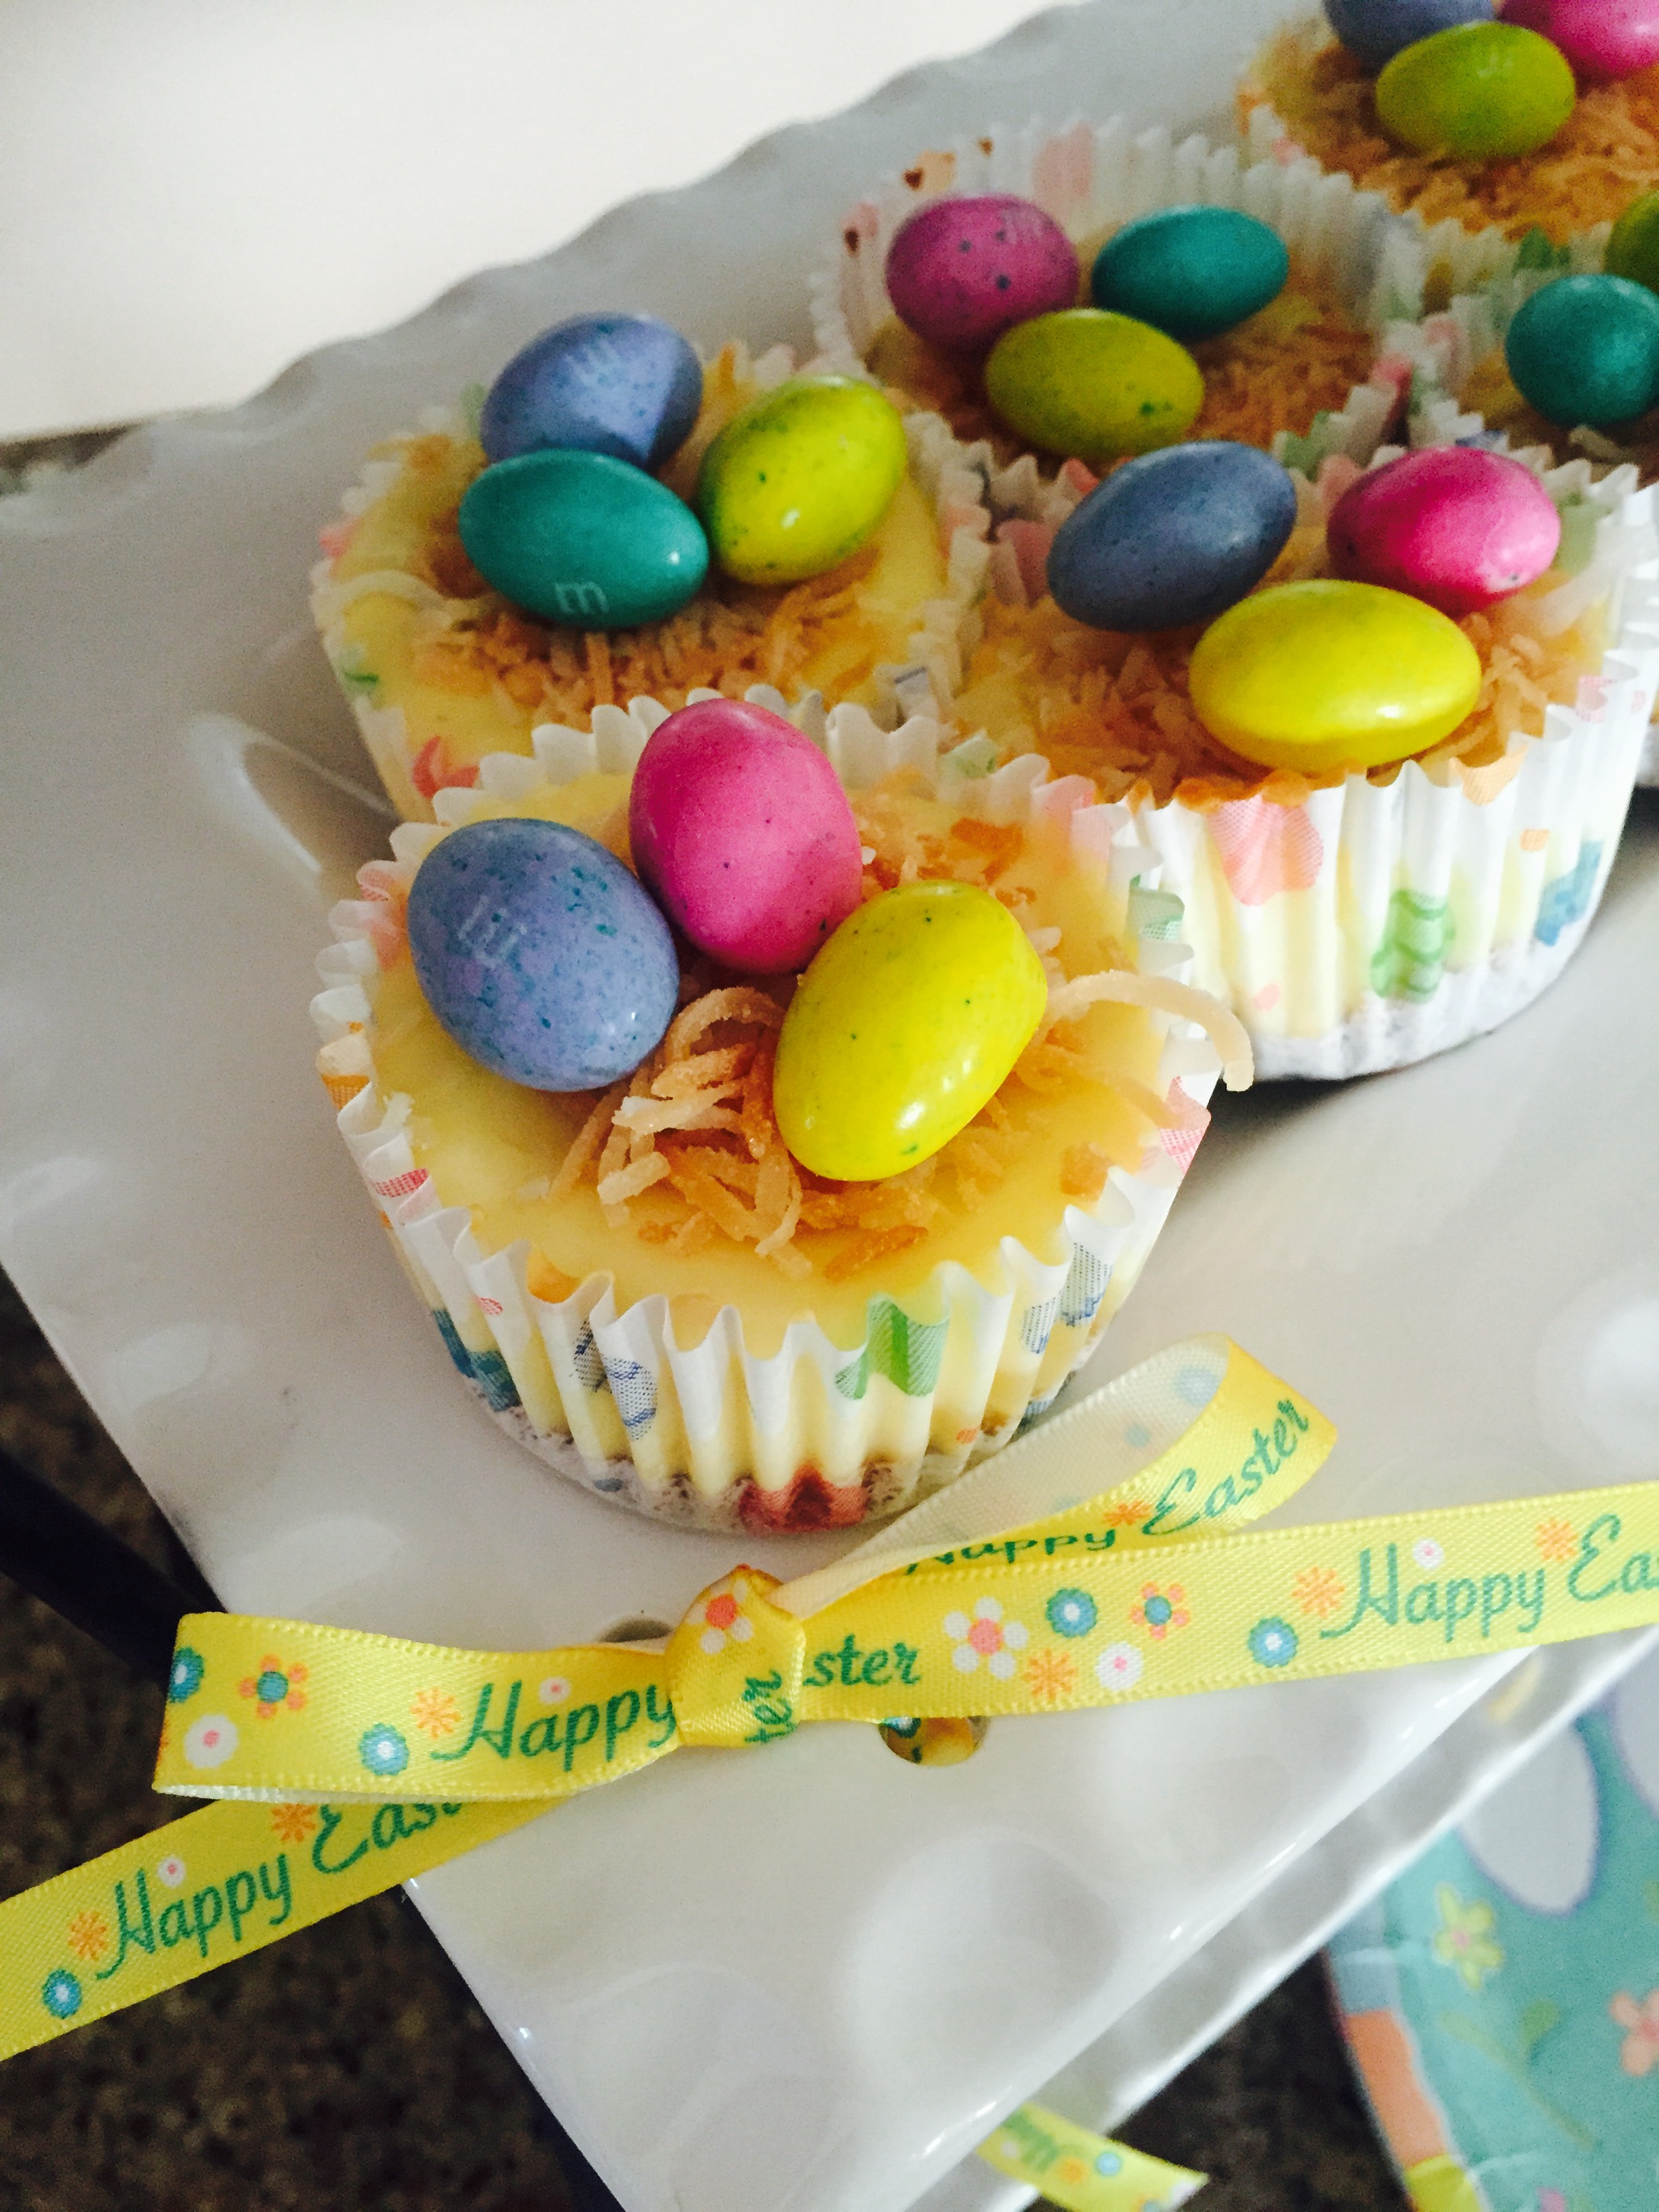
The recipe calls for toasted coconut to make it look like a little nest on top so to do that, lay out as much coconut as you’d like and bake it for ten minutes at 350!

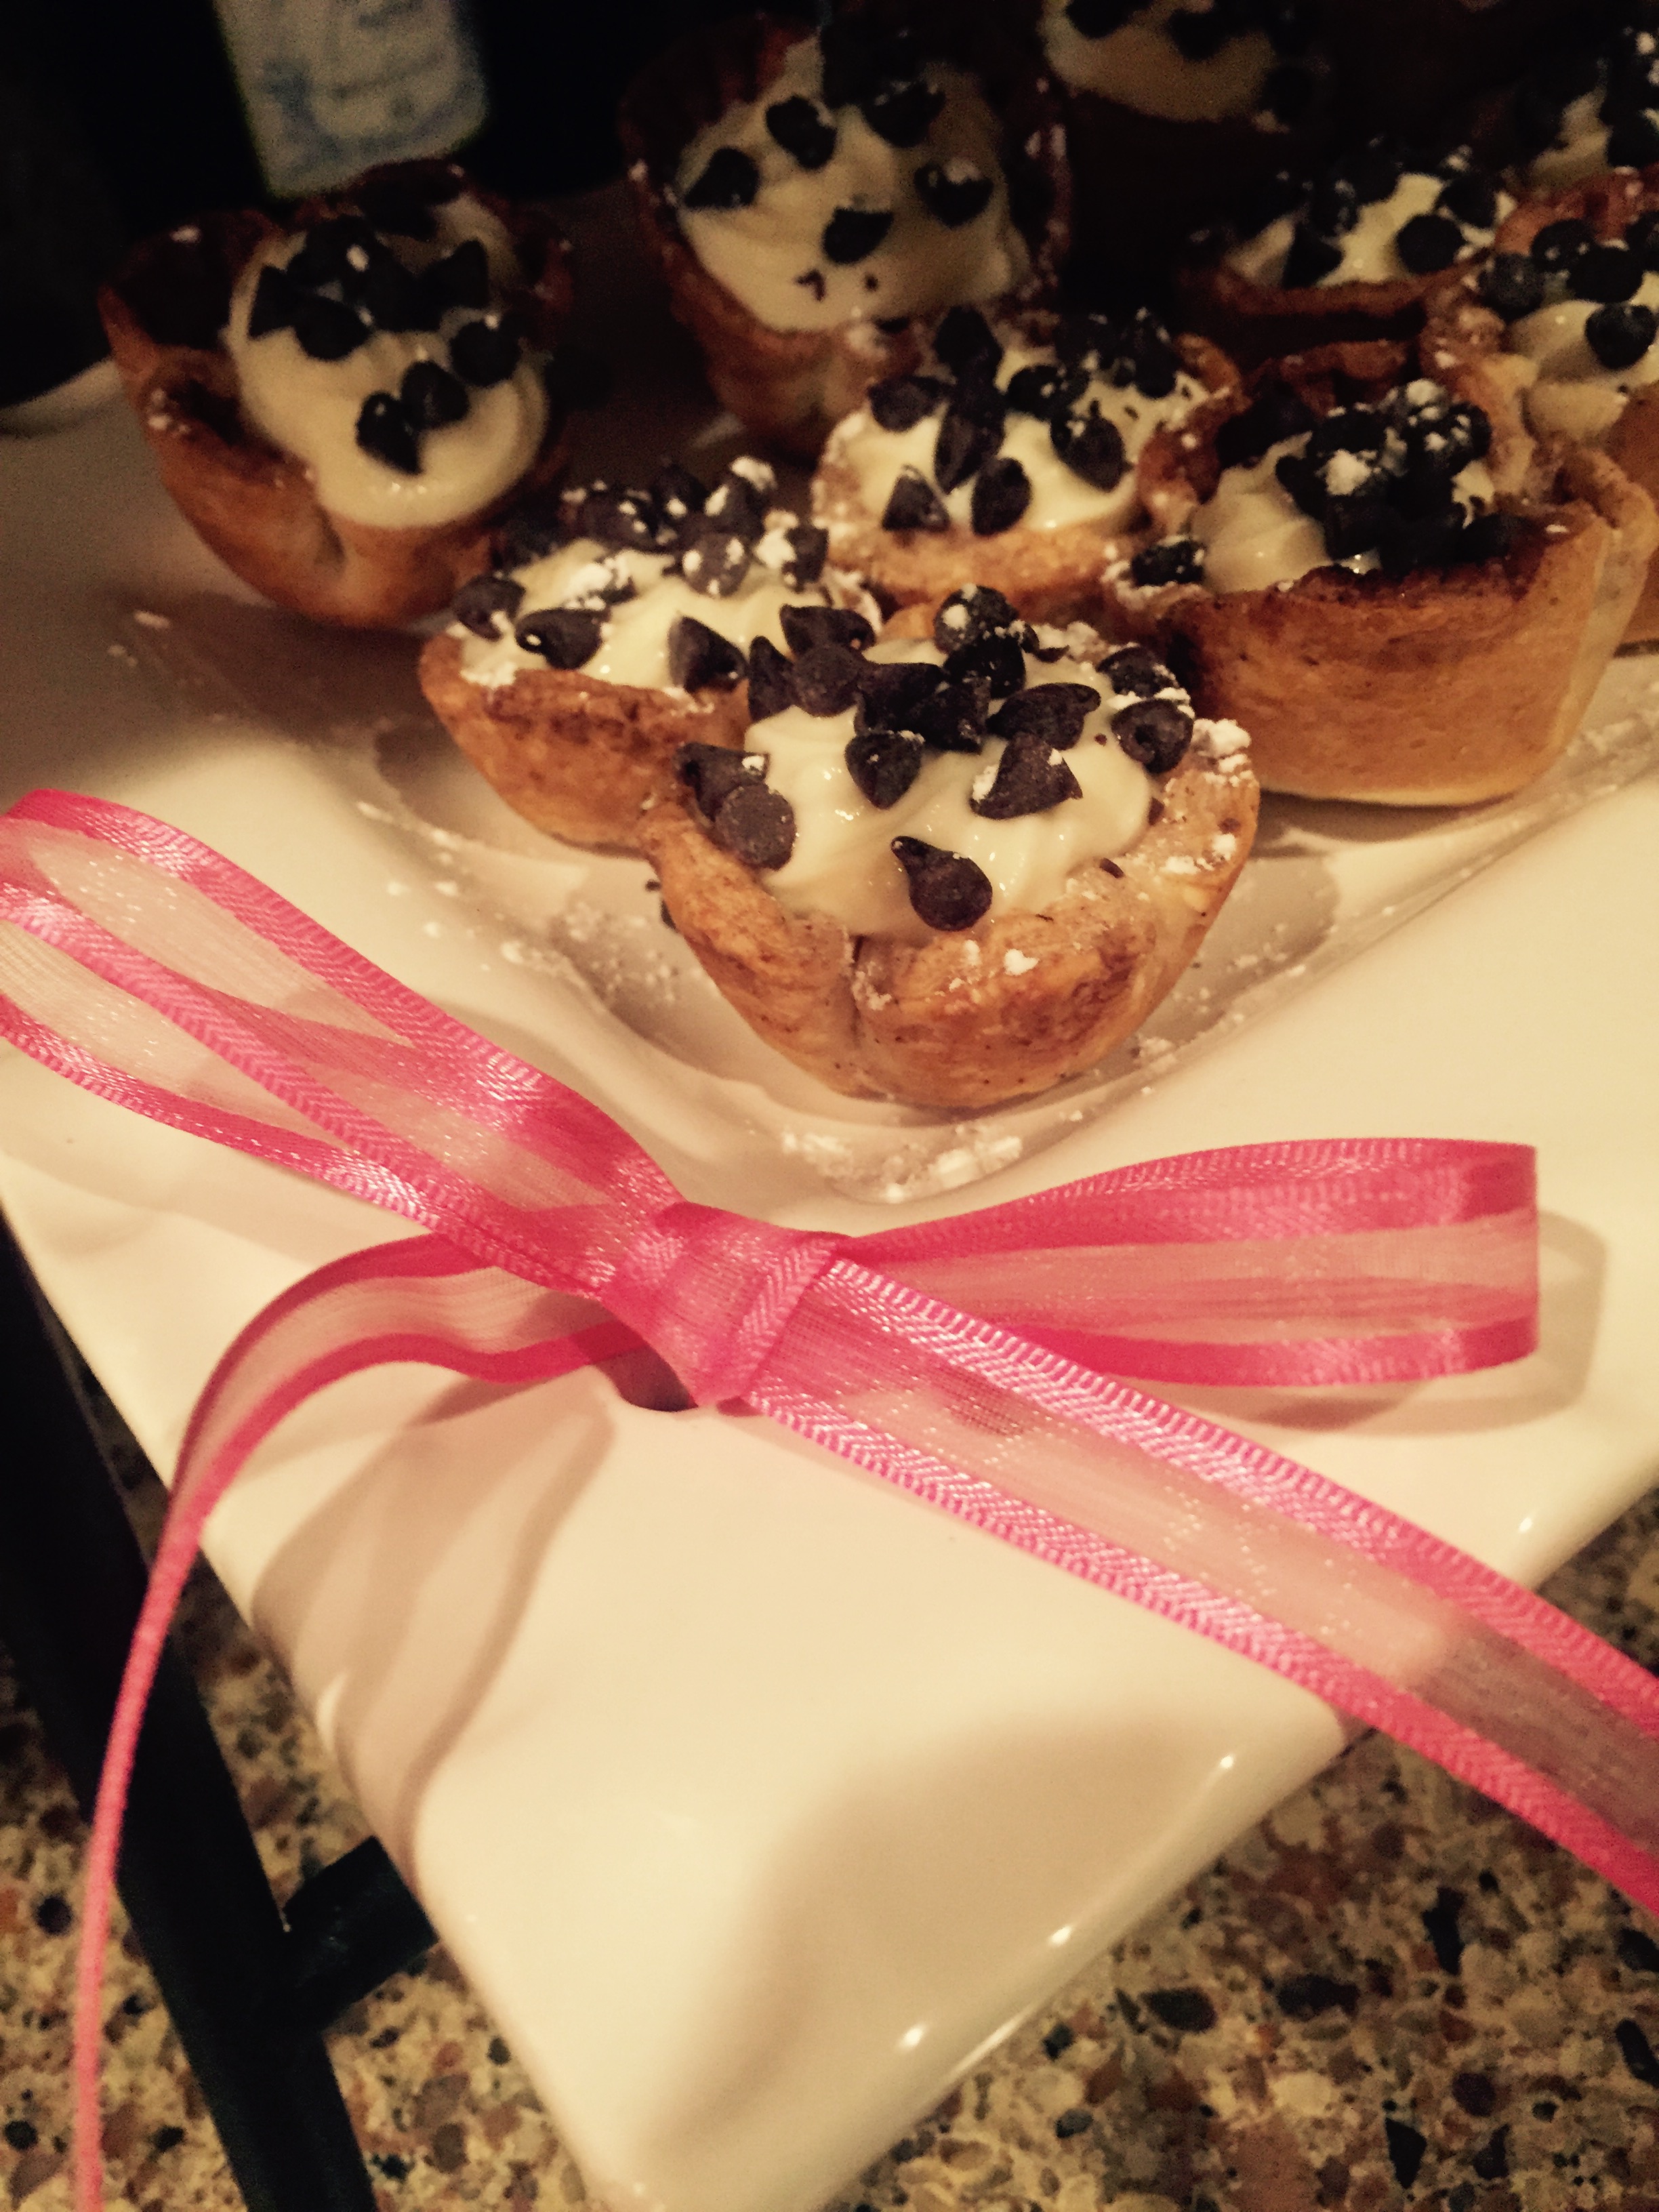
Once it’s done and all cool, top your cheesecakes with a little coconut and a few speckled M&Ms for a cute, sweet, Easter treat!

FullSizeRender (27) FullSizeRender (28)


So those are the cute little bird’s nest Easter cheesecakes, but since Easter is now over I thought I’d give you guys a few extra ideas for the summer time coming up or any time throughout the rest of the year you feel like making them!

  • Some cherry pie filling from the grocery store on top would make for a perfect cherry cheesecake bite!
  • Cut up some strawberries, put a little sugar on them and leave them in the fridge overnight, then top off the cheesecakes with those yummy strawberries and syrup that they made for a nice summertime treat!
  • OR put a little whip cream and fresh blueberries on top for an awesome springtime dessert!

I hope you guys liked this recipe! It was a little time consuming but well worth it for the super rich and yummy cheesecake!

xoxo,

Kristin

Holy Cannoli!

HEY Y’ALL!

Happy Monday again! I hope your weekend was SPECTACULAR! Mine was so awesome, my Ba-naner (aka my Nana, the best grandma in the whole world) came down and stayed for the weekend and my sissy (LaurenOnTheHill) and bro-in-law (#LooseCannon…..you’ll have to read the blog for that one! 😉 ) came over on Saturday for an AWESOME Italian dinner! We did bruchetta chicken and some yummy pasta so, obviously, in keeping with the Italian theme I had to make an Italian dessert! And I am OBSESSED with Cannolis! My experience with them started (and all my Italian friends, don’t hate me!) with the Cannolis in the Bistro of our college dining hall. I know I KNOW those are probably the least authentic and so sugary that a true Italian would take one look and dismiss it immediately, but they were sooooo good! And I was thinking it was some awesome custard inside of fried dough and when I looked up recipes to make them I was SHOCKED that it’s actually cheese inside of them! But I decided to give it a go anyways and they turned out AWESOME! So I just had to share them with all of you!

I got the original recipe from Pillsbury’s website (via Pinterest, the greatest website in the world) but I changed a few things so I’ll share my version with you! They’re mini’s so you will need a mini muffin tin! It’s such a simple recipe, although a little time consuming (I’m talking like 30 minutes time consuming, not that long at all) when it came to the dough, but they’re just so stinkin’ cute and yummy and easy to transport that you can easily take them to your next party or get together! So here we go!

You’ll Need

 1 15oz container of whole milk Ricotta cheese

Granulated Sugar

Powdered Sugar

Vanilla Extract

2 Pie Crusts

Ground Cinnamon

Mini Chocolate Chips

Flour to lightly flour your working surface


FullSizeRender (5)For the Filling

Step 1: Preheat your oven to 425

Step 2: Mix together the container of Ricotta, 2 Tbsp of Granulated Sugar, 1/2 Cup of Powdered Sugar, and 1/2 Tsp of Vanilla Extract in a large mixing bowl until creamy and smooth. It says use a hand mixer but I stirred mine with a spoon and it came out equally as creamy!

Step 3: Cover the bowl and refrigerate


FullSizeRender (6)For the Cups

Step 1: Lightly Flour the surface you’ll be rolling the pie crust out on

Step 2: Roll out each pie crust (I did it one at a time)

Step 3: Sprinkle 1/2 Tsp of Cinnamon and about 3/4 Tbsp of Granulated Sugar onto each pie crust

Step 4: Use a rolling pin to lightly flatten and press the cinnamon and sugar into the pie crust (you don’t want to flatten too much or they’ll rip when you try to press them into the muffin tin….I ripped about 5 of mine)

Step 5: Cut out small 2 1/2 to 3 inch circles to put into the bottom of each mini muffin

Step 6: Put each dough circle gently into the muffin tin

Step 7: Bake for 10 minutes!

IMG_0056 IMG_0058IMG_0057

**Above is Step 3, Step 5, and Step 6! My momma had an awesome pampered chef press with a design on the edge but a drinking glass would work just as well to cut out some circles! I also ended up with a lot of dough from around the edges that I just mushed back together and rolled flat to get a couple more circles out of!**

FullSizeRender (11)

After they’re all done baking, let them cool in the pan for about 10-15 minutes and then take them out and put them on a plate or cooling rack if you have one. (They will shrink up a little bit as you can see in the picture above but they all still held a good amount of the filling!) Once they’re completely cooled you’re ready to put the filling in them. I would wait until about 30 mins to and hour before you plan on serving them to fill them or you can do it ahead of time and stick them back in the fridge to keep the filling’s consistency. I used the same technique I did in my Reese’s Cupcake recipe to do the filling, put it into a decorating bag with the desired tip and squeezed filling into each cup. You can also spoon some filling into each cup or put the filling into a gallon sized plastic bag and cut the tip off to pipe some in!


FullSizeRender (7)

For the Topping

Step 1: Sprinkle on as many little chocolate chips as your heart desires (I’m a choco-holic so the more the better!)

Step 2: Lightly sprinkle on some powdered sugar

FullSizeRender (8) FullSizeRender (9) FullSizeRender (10)

And there you have it!!! Your baby cannoli bites are ready to eat! YUM! Seriously, these turned out even better than I hoped and were a big hit with my family!!! I really think the cinnamon sealed the deal for these little guys, it complemented the pie crust and the filling SO well! So go make some sweet little Italian treats and get this week started right!


This is my last post for a week or two because I’m heading off to HAWAII! AHHHH! I’m so excited! So this week’s Drugstore Finds Friday will be postponed until next Friday and I’ll DEFINITELY do a blog post about all the fun times and cool adventures we go on in Hawaii!

Hope you all enjoy making (and devouring) your Cannoli bites and have a wonderful week and weekend! Next time you read I’ll (hopefully) have nice tan and a million awesome stories!

xoxo,

Kristin